Throne And Liberty: Specter's Abyss Dungeon Walkthrough
페이지 정보
작성자 FM 작성일25-10-10 10:18 (수정:25-10-10 10:18)관련링크
본문

Throne And Liberty Mounts and Liberty 's first co-op Dungeon can be accessed at level 20, so players might want to know beforehand what dangers lurk inside the Specter's Abyss . With two sub-bosses and one final boss, Specter's Abyss also boasts a lot of juicy rewards that players can sink their teeth into .
This challenge for up to six players will test all their skills and coordination. It can be completed in a short run, but to pass each boss without any issues, players need to know a few things. With this complete Dungeon guide, they'll be able to sort out all the challenges they'll find, and claim their rewards with no issues.
Close
Players will be facing Arkeum Invading Forces in this Dungeon, which consists mainly of Shadowmancers, Archers, and Melee Fighters.
Shadowmancers : Use burst area AoE spells; single target nukes; annoying curses that cause Weakened debuff.
Archers : Attack fast and from a safe distance; can use a dash skill to close the gap; erratic aggro.
Soldiers : Sword and shield and Greatsword users; highly resilient and damage sponges.
Below, players will find details about what each role should do against each of these enemies:
Tanks: Aggro Soldiers first, then focus on Shadowmancers and Archers.
Range DPS : focus on dealing with Shadowmancers as priority, dodge AoE and take distance from melee fighters.
Melee DPS : Focus on killing Archers first, as they will target friendly mages and archers first.
Healers : Keep the Tank alive as the main priority while the DPS deals with the small fry.
The dungeon is divided into three sections:
The main hallway, leading to the Inner Hall where the first boss is located.
The hallways with the lever rooms, a circular arena where the second boss stands guard.
The underground auditorium where the final boss fight will take place .
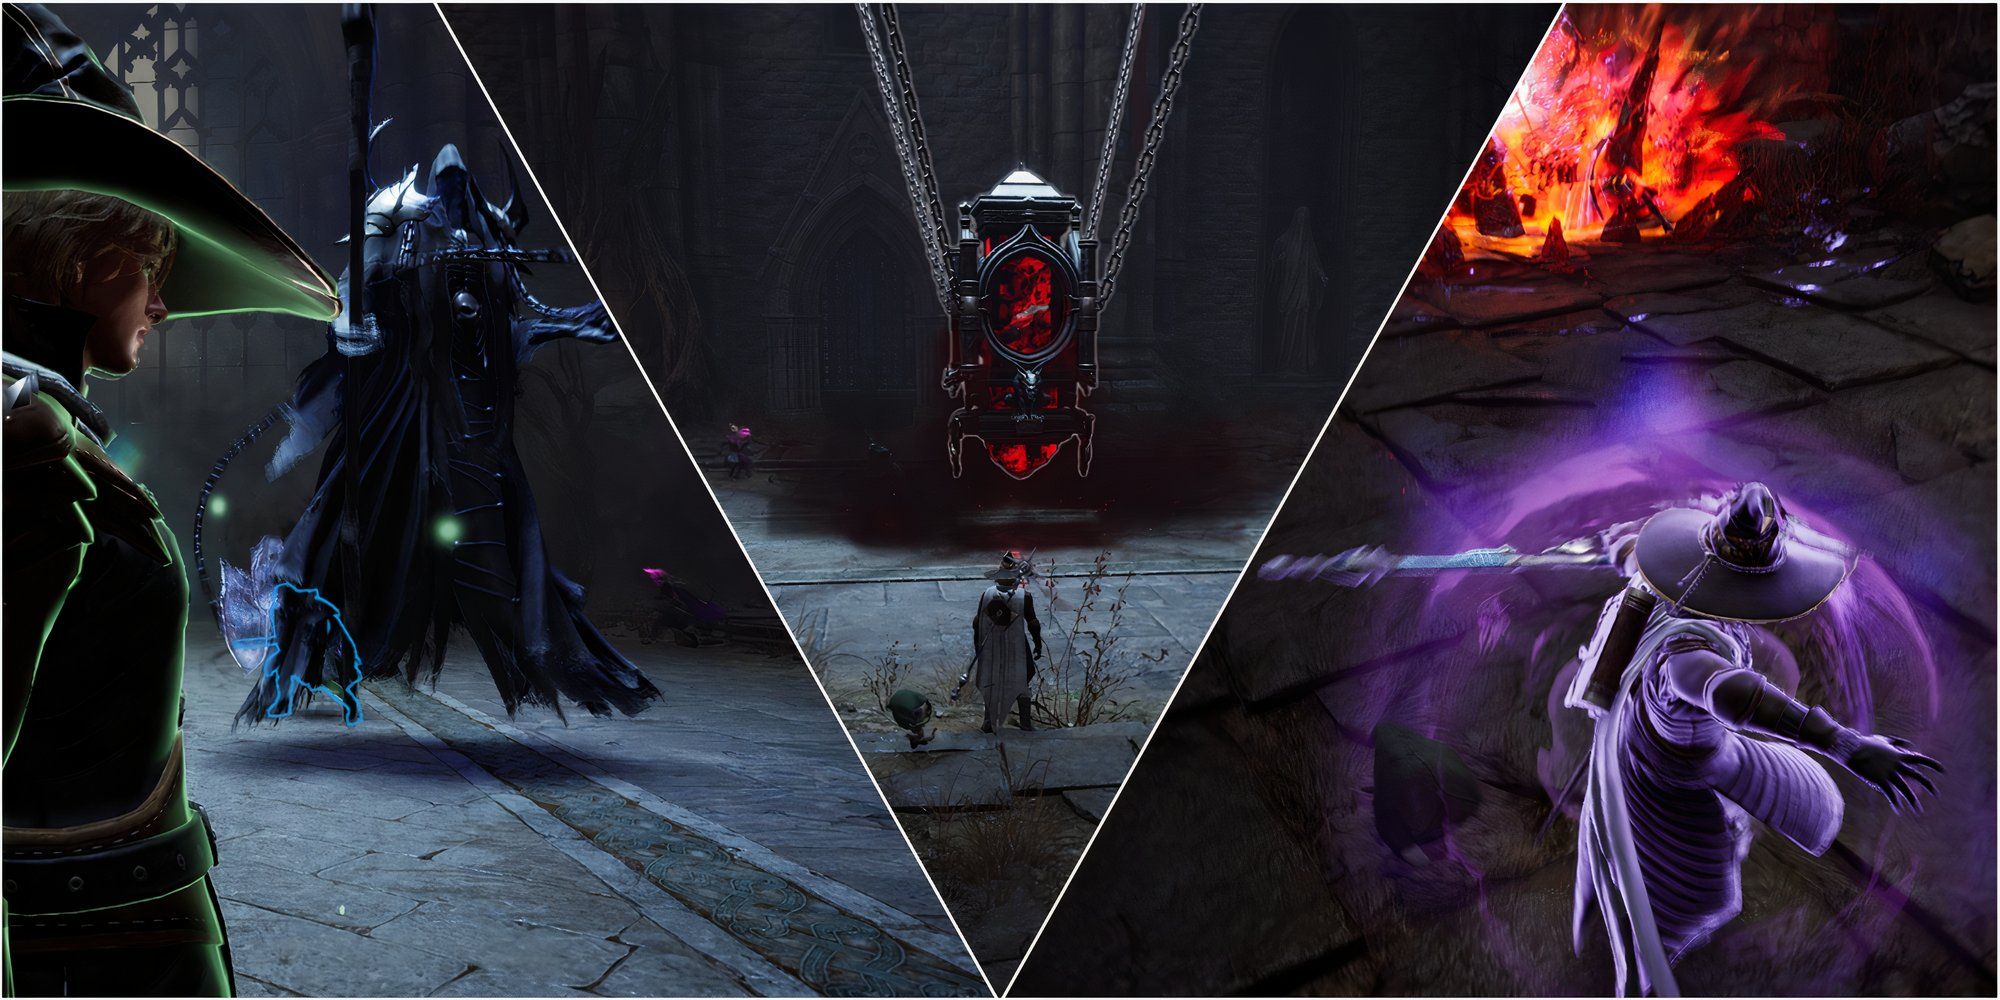
To reach this first boss, players will need to go through a series of combat encounters against lesser Elite Groups consisting of Archers, Shadowmancers, and Melee Fighters. They will need to clear three groups of these mobs before reaching the room where the Elite Arkeum Shadowmancer lies waiting.
The boss fight consists of reducing the Elite Shadowmancer's health to 0, but there are a few attacks players should be aware of:
Circular AoE Shadowpools : Avoid at any costs; they can delete DPS and Healers.
Small Shadow Nova : Melee DPS and Tanks will be pushed back. If there are AoE pools behind them, they will fall inside them.
Gravity Strike : The Shadowmancer will yell " I will end your life !" then grab one or two players, hurl them into the air, and smash them against the ground. This causes extreme damage and can be countered by CCing the boss with any skill that causes Disruption or Stun . Listen to the voice cue of the boss, and when she yells, wait 1.5 seconds before stunning her .
The path to the Second Boss might be a little bit trickier and requires some cooperation. Players need to reach two separate " Lever Rooms " and activate said levers to lift two barriers that impede access to the boss's arena. One of the barriers is called the " Poison Barrier ," and the second is the " Fire Barrier ."
Both rooms will be protected by a series of Elite mobs composed of Shadowmancers (2), Archers (1), and Soldiers (2). Clear out the enemies and activate the lever located in the middle of the room, which will open the gate leading to the circular arena.
The Elite Arkeum Riot Squad Captain will be accompanied by three mobs roaming the room; one Archer , one Soldier , and one Shadowmancer . This is what players should do:
Clear the mobs, being careful not to aggro the boss.
Once the room is clear, start the fight with the Tank leading and taking aggro.
The boss will have a "rage attack" and will yell: " Impossible! " and then " Die, " releasing a potent AoE that will most certainly wipe out the entire team.
To prevent its AoE attack , half a second after the audio cue, use a Stun attack to interrupt the charge of the AoE. This will allow players to keep doing DPS. The Icebound Tomb from the Staff skill tree is incredible here; it will not freeze the boss, but interrupt the casting anyway. The Fierce Clash from the Sword and Shield skill tree will smash the boss against the wall and stun him, also interrupting his attack.
Tanks : Aggro the boss and use Fierce Clash when it yells " Impossible " to prevent party wipes. Keep spamming Defense Stance and Block ( when necessary) to mitigate the damage.
R ange DPS : Deal as much damage and as fast as possible; interrupt if they have skills like Icebound Tomb .
Melee DPS : Deal damage from behind the Boss, as it has a sweep attack that can cause severe damage in front of him.
Healers : Keep the Tank alive by using healing and shielding , and focus on curses and minor DPS as much as possible.
After the second boss is dead, it's time for the final battle. The gate in the back of the circular arena will open, leading to a campsite / checkpoint where players can recover and prepare for the final fight. When the players are ready, proceed down the stairs to the auditorium, where a red-glowing Coffin-shaped structure resides. Interact with it to summon Helibel, the final boss.
Helibel uses the following attacks :
Shadow Slam : Smashes the ground and directs a straight line of damaging energy. Needs to be dodged.
Cleave Attack : Sweeps in front of it, so melee DPS should stay behind the boss and let the Tank deal with it.
Shadow Nova Attack: Blasts the whole arena after a voice cue. This cannot be dodged and must be Blocked.
Death Strike : Targets a specific player, channels briefly, and instantly kills the target . To prevent this, players must group up when Helibel does the voice cue, thus distributing the damage between them by Blocking at the right moment.
Tanks : Wait until everyone is inside the arena; otherwise, there might be players who get locked out of the boss fight. Then, Aggro Halibel and use Defense Stance and Block (when necessary) to mitigate the damage. Halibel will teleport several times during the fight, so Tanks need to follow him through the arena, or they'll lose aggro. Try to dodge his slam attack to avoid unnecessary damage.
Range DPS : Deal as much damage and as quickly as possible; Halibel is immune to most CC and Status Effects, so don't waste time with it, just do raw DPS. If targeted by Helibel's Death Strike, run toward the Tank and let others gather around, then use the Block Skill to mitigate.

Melee DPS : Deal damage from behind the boss, and dodge when it does the sweep attack. If targeted by the Death Strike , listen to the voice cue, gather alongside the Tank, and use the Block Skill to mitigate damage.
Healers : Keep the Tank alive by using healing and shielding, and focus on dodging Halibel's slams. If targeted by Death Strike, run toward the tank and then use the Block Skill to mitigate the damage. Avoid receiving unnecessary damage, and use Area Heal only after Halibel uses the Shadow Nova to heal some of the damage party members might not have blocked.
댓글목록
등록된 댓글이 없습니다.
